Float Callout
Table of Contents
Overview
Float Callout will allow you to position side note or info box either to the left or right of the main note with other content wrapping around it. It uses callout-metadata to specify which side to float to and the size of the callout
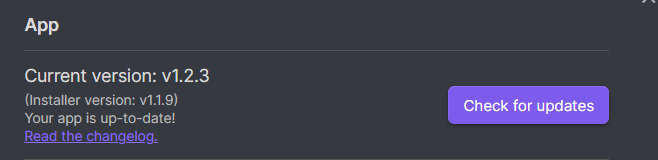
For this feature to work, please make sure your Obsidian Installer version is at v1.1.9 or higher as per screenshot below. Note that in Obsidian the “Current version: v1.x.x” is the App version while “(Installer version: v1.x.x)” is the Installer version I’m referring to above.
How To Use / Basic Syntax
- Add
leftorrightto the callout-metadata e.g.[!info|right] - Make sure the callout is above the paragraph that you want to have it wrapped around
Here is an example markdown
### Main Article

> [!info|left]
> Addition note to the main article

Content of the main article
Basic syntax will apply to Reading View. To make it work with Live Preview see Additional Controls below
Additional Controls
Adjust Width Definition
By default, the width of the callout will dynamically follow the content. You can make it fixed width by specifying the width option. There are 3 width option:
-small- default width 300px-medium- default width 400px-large- default width 600px
Here’s an example markdown
## Main Article

> [!info|left-medium]
> Addition note to the main article

Content of the main article
Apply to Live Preview
By default, if you only specify either left or right, Float Callout will only work in Reading View. If you want it to also work in Live Preview, prepend float- before the left or right e.g. [!info|float-right]
Here’s an example markdown
## Main Article

> [!info|float-left]
> Addition note to the main article

Content of the main article
Note on Editing in Live Preview
In previous version of Float Image, editing text next to it was quite janky. I’ve improved it a bit (for
float-rightat least). Forfloat-leftyou may still find selecting and navigating the text (up and down) still not possible.To edit, it’s better to navigate using keyboard (from the top or bottom) instead of mouse/trackpad. Even better, use Source Mode to edit.
Combining the Additional Controls
You can also combine the above controls together. Here’s an example markdown
## Main Article

> [!info|float-left-medium]
> Addition note to the main article

Content of the main article
Additional Global Settings via Style Settings
If you have Style Settings plugin installed, you may control the following aspects (go to Style Settings > Modular CSS Layout - Multi Column > Float Callout)
- Hide / Show SNW Indicator in Float Callout
- Adjust width definition for “small”, “medium”, and “large”
- Adjust margin top for Float Callout
Example
Simple small callout float to the right
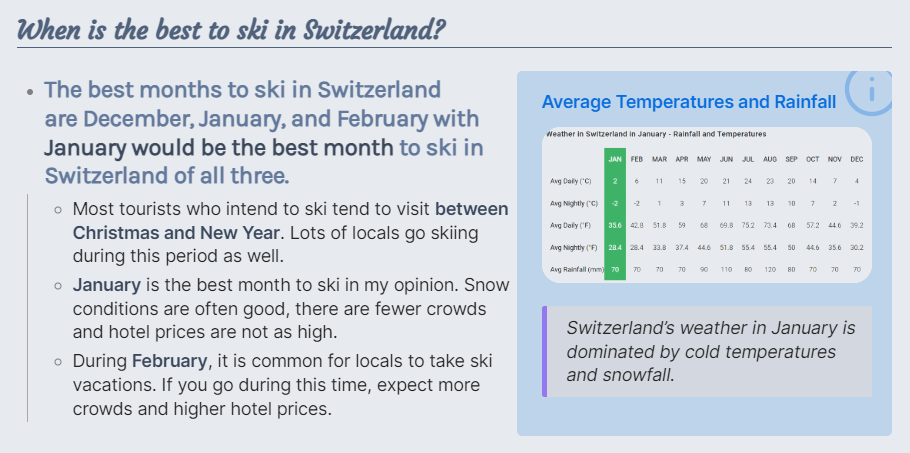
## When is the best to ski in Switzerland?
> [!info|float-right-small] Average Temperatures and Rainfall
> ![[Pasted image 20221105233818.png]]
>> Switzerland’s weather in January is dominated by cold temperatures and snowfall.

- ### The best months to ski in Switzerland are December, January, and February with **January would be the best month** to ski in Switzerland of all three.
	- Most tourists who intend to ski tend to visit **between Christmas and New Year**. Lots of locals go skiing during this period as well.
	- **January** is the best month to ski in my opinion. Snow conditions are often good, there are fewer crowds and hotel prices are not as high.
	- During **February**, it is common for locals to take ski vacations. If you go during this time, expect more crowds and higher hotel prices.